
Availability: In Stock
Price: $5/ 50 gram pack
When setting up a new fish tank it is important to understand the nitrogen cycle as it will effect the health of your animals. In a new tank there is no beneficial bacteria that can help break down wastes in the water and therefore a spike in ammonia and nitrites will eventually happen and can effect your fish’s health. Often to cycle (build enough beneficial bacteria) your tank you can add a filter/media from an already cycled tank but the potential to also introduce diseases and unwanted pests may occur. An alternative is to purchase and add a few fish to help generate wastes in the water so that the bacteria can feed off this waste and multiply, but the fish’s health will be compromised as it will be exposed to high levels of ammonia and nitrites.
A safer and cheaper way to cycle your tank is to do the fishless cycle which involves maintaining a certain level (see below) of ammonia in your water so that beneficial bacteria (from the air or bottled bacteria) can become established into the tank and help feed and grow off of this ammonia. Ammonium chloride can be used as a source of ammonia to initiate the growth of nitrifying bacteria without the presence of animal life. Ammonium chloride is safe when used for cycling fish tanks and unlike liquid ammonia which may be sold as cleaners, it is uncertain if other additives or forms of ammonia will leave residues in your fish tank and may not be fish safe.
A general starting point for the fishless cycling is by starting with an ammonia level between 2-3 ppm (mg/L) and if you are planning on stocking your aquarium with a lot of fish, then you’d want a higher starting point between 3-4 ppm (mg/L). You should not need to go any higher than 4.5 ppm as it becomes too toxic for beneficial bacteria to even survive in.
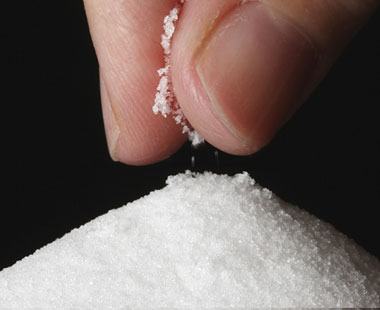
Each packet will have 50 grams of ammonium chloride and a measuring spoon which will be enough to cycle many tanks. Each 1 gram (1000 mg) when mixed with 100 gallons will create a 2.5 mg/L concentration of ammonia in your tank. It is best to use an ammonia test kit to make sure you get your target ammonia level in your fish tank.
Note:
-Fish should not be present while using ammonium chloride.
-Make sure you keep your filter and heater performing at the same parameters as what you plan on keeping your fish at i.e. same pH, same temperature, same gh/kh.
-Adding Fluval Cycle, Seachem Stability, or any bottled beneficial bacteria will help speed up the cycling process due to the introduction of beneficial bacteria into your tank.
Instructions:
1- Make sure your aquarium heater (if you are using one) and your filter is running normally.
2- Add your ammonium chloride and allow to dissolve and mix throughout your tank.
3- Measure the amount of ammonia in your tank with an ammonia test kit and add more ammonium chloride to add more if needed, or do a water change if there is too much ammonia in your tank. Make not of the total amount of ammonium chloride was needed to achieve your target ammonia level. This help when trying to determine how much ammonium chloride to add to maintain your desired ammonia level.
4- Add beneficial bacteria if you have as it will speed up the cycling process, but is not mandatory.
5- Wait for 6 to 7 days before you test your ammonia level again. Following the ammonia test, determine if ammonia levels have started to drop. If there is no change, you can add more beneficial bacteria, otherwise you will have to keep waiting until beneficial bacteria becomes established in your tank (it always will over time). Repeat this step until you have noticed that ammonia levels have started to drop. As bacteria starts to consume the ammonia and multiply, the water may go cloudy (which is normal), and eventually clear up.
6- Once you have noticed that ammonia levels have dropped, you will need to add enough ammonium chloride to raise it back up to starting levels, see step 3. One easy way to do this is to add 1/4 of the amount of ammonium chloride you had originally used and dissolve in 100 ml of water. Add 10 ml of this solution in your tank and once mixed throughout the tank test your ammonia and see how much it has risen and repeat until the desired ammonia level is reached.
7- Because the ammonia level has started dropping, that means that there is beneficial bacteria growing in your tank. Rather than waiting every 6 to 7 days to test ammonia levels, you can test every 3 to 4 days and repeat step 6 to always maintain the ammonia level as that is the bacteria’s food source. Soon you find that there will be almost no ammonia remaining. At this point, there will be enough bacteria present to break down the ammonia but now you are left with nitrites in your tank which a different strain of bacteria will need to break down. This is when using a nitrite test kit will come in handy.
8- Keep feeding your tank with ammonium chloride regularly to not starve your bacteria and test for nitrites every few days. When both your ammonia AND nitrites are both at or almost 0, then your tank is ready for livestock.
9- The day before or the day of adding livestock, do a 50% water change first. From this point on, you will not have to add any more ammonium chloride as the livestock will now produce the ammonia for the bacteria to feed off from.
Categorised in: All Products, Fertilizers, Water Conditioners